This post is part of a series of research I have been putting together addressing the YouTube Censorship crackdown or #youtubepurge that has happened in the past few weeks. In this post I want to share with my readers step by step instructions with pictures using my own Vimeo account and blog. The idea here is to be able to safely publish your own videos on your own blog so that “controversial” information can be shared with readers without having to worry about your videos getting blocked in certain countries or, strikes on your channel, or any other kind of malicious attempt to censor your content.
Here is what you will need to do this:
#1) A PAID WordPress Blog.
Buy your domain. Own your domain. And pay for hosting your domain. It can cost between $12-$25 or more a month. I use Bluehost and host several sites through them. They are secure to hacking. I use wordfence for security on my blogs. The reason why you need the paid website account is simple. Without it you will not have full control over your own blog and you will not be able to install all the different plugins you might want to use to make everything work the way you want it too. Free Blogs are a BAD IDEA.
#2) A PAID Pro Vimeo Account.
Vimeo Pro costs something like $69 a year, and if you want more storage you can beef it up and get a bunch of storage for $200 a year. This is the account I have as I use it for many of my websites. The difference between Vimeo paid Pro and Vimeo free is night and day. A free Vimeo account is basically just like YouTube except you’ll get a lot less traffic than you would on YouTube. They can censor your videos or pull them off of the internet just like YouTube does. But a paid Vimeo account… this makes all the difference in the world! The reason why is the privacy setting features. Basically it allows you to control your video content and the way the player looks and where it is viewable on the internet. Trust me, it’s a whole other world of opportunities and totally worth the price.
#3) A PAID mailing list program like Aweber is also highly recommended.
Once upon a time a long, long time ago, one of my posts went viral totally on its own, loads of people read it and I got a ton of traffic without having to do a thing. This rarely every happens. In the world of reality, you need to promote your content to people who want to hear from you. A few years ago I started using mailing lists to promote my blog posts, my videos and any other special things I had going on and it is how I get the traffic I do. I use Aweber and pay about $150 a month for having a mailing list of over 10,000 people. You can also do it for lower rates based on your audience size. Also there are other mailing lists programs out there, but I refuse to use anything other than Aweber as its one of the best one’s out there. My peeps on my lists are super important to me.
I know this can be a lot of money for some people. However we have to remember that you get what you pay for and it is all the free Youtube channels that are getting shut down. If you are using Youtube’s services for free, they are under no contractual obligation to host your content, period.
Ok assuming you’ve got all this set up, lets get started.
First upload your video to your paid Vimeo Account. Here is a video I uploaded to Vimeo for use in our energy academy.
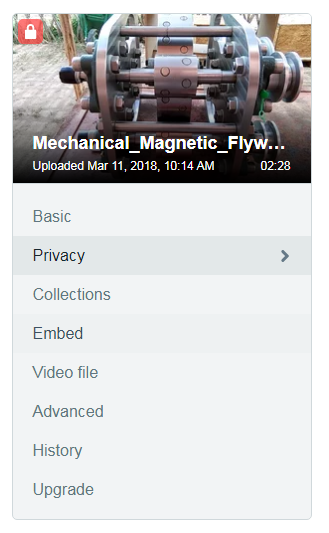
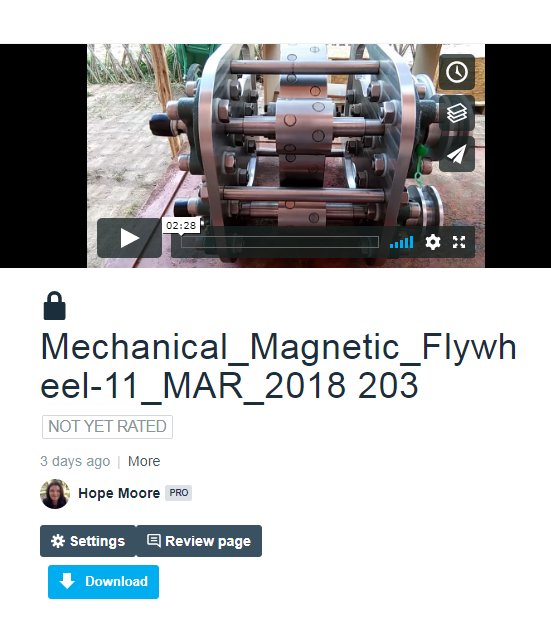 Then click on the settings icon which will bring you to this next page. On this page click the privacy tab.
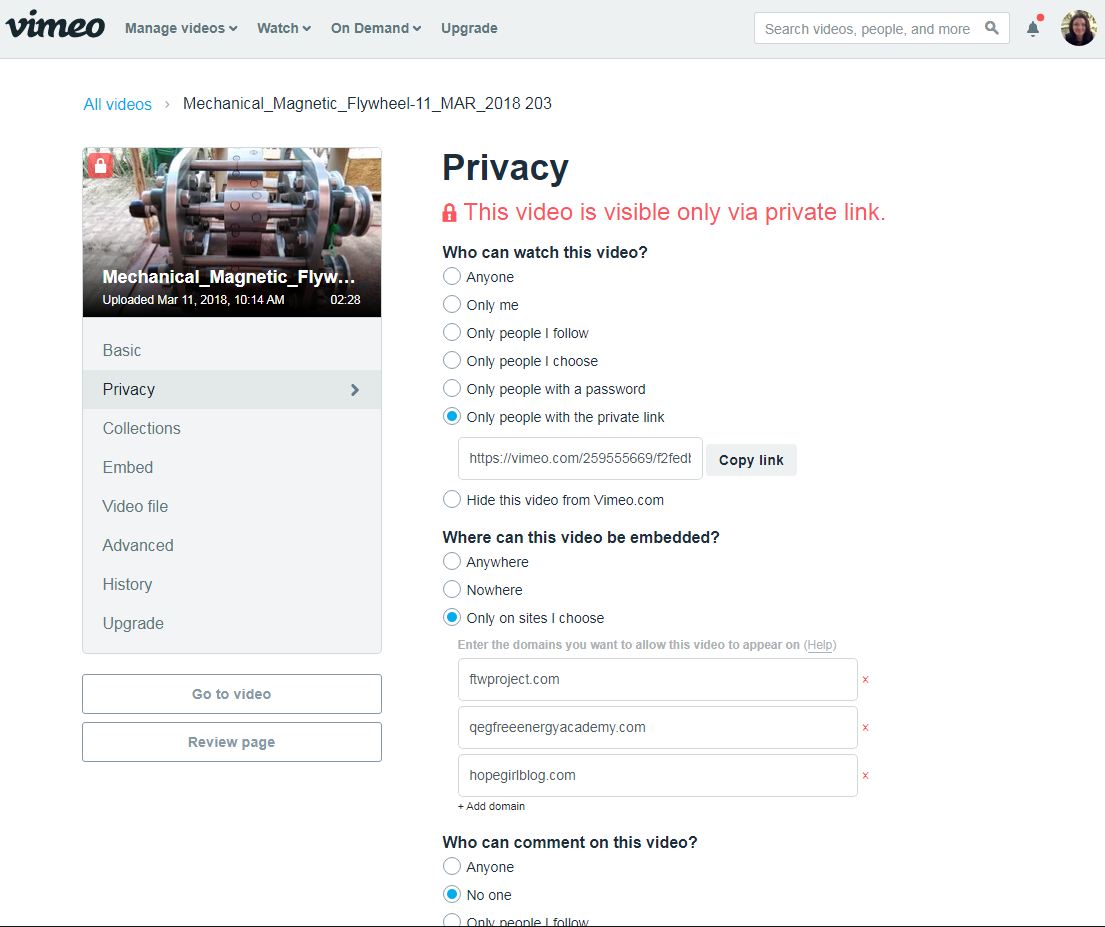
Next you want to set the privacy settings so that you can embed this video into a blog post and the only place your audience will be able to view it is by clicking play on your blog post. This is very important as it makes it so that your video is not listed on Vimeo.com. (you can also select the option on this page that says “hide this from Vimeo .com” but that is not always necessary as long as the video is set to private.
Make sure these settings are set. Choose:
-only people with the private link
-only on sites I choose (enter your blog website url here)
If you want to allow people to download this video to their computer then click that option on this page.
Make sure you click save on the bottom of this screen. You can tell that the video is private because the lock icon is in the locked position.
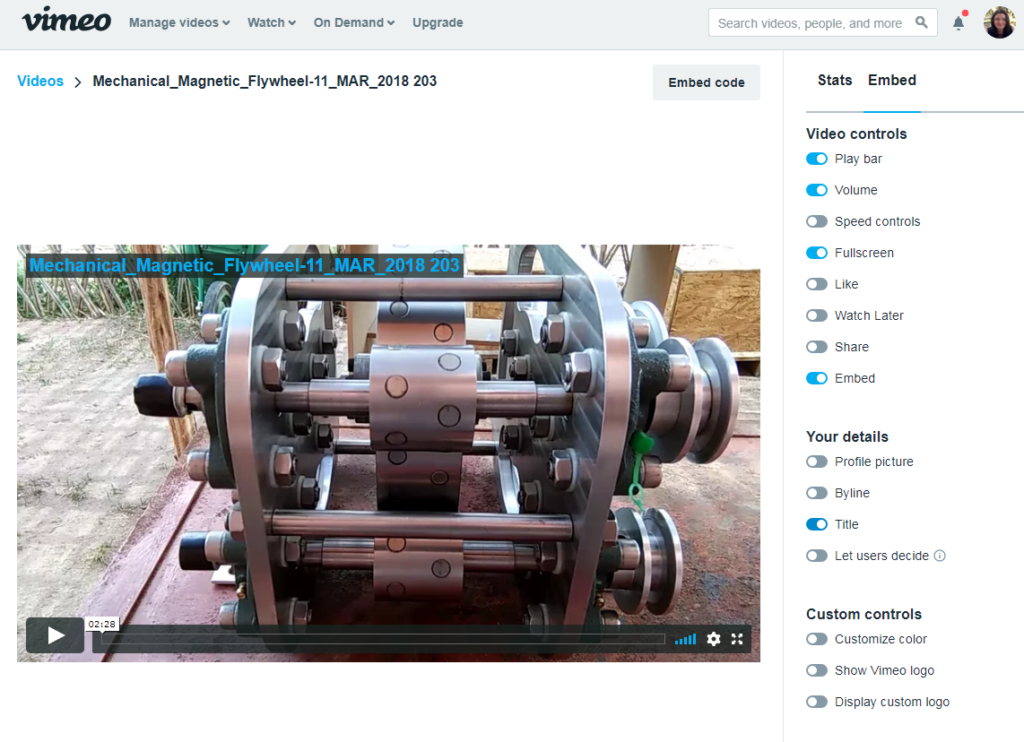
Next I suggest you click on the embed section. This is where you can change what shows on the video you are going to be embedding on your blog.
On the right side of the page you can choose which features you want to show on your player when you embed it into your blog.
I suggest TURNING OFF the following:
speed controls, watch later, like, share, profile picture, byline, let users decide, ALL custom controls.
Then click embed code
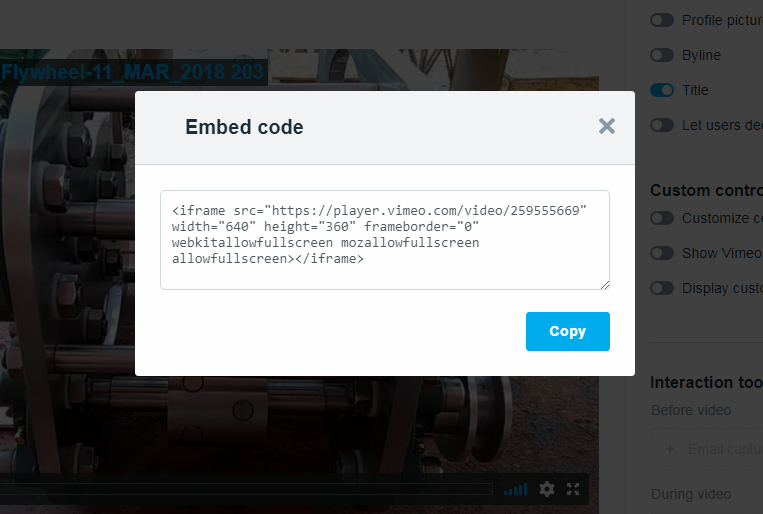
Copy this embed code and then go to your WordPress blog admin panel and create a new post.
In the editor window click on the text tab and past the code in the text editor box. Then click on the Visual tab and you will see your video as it will display when you publish the blog post.
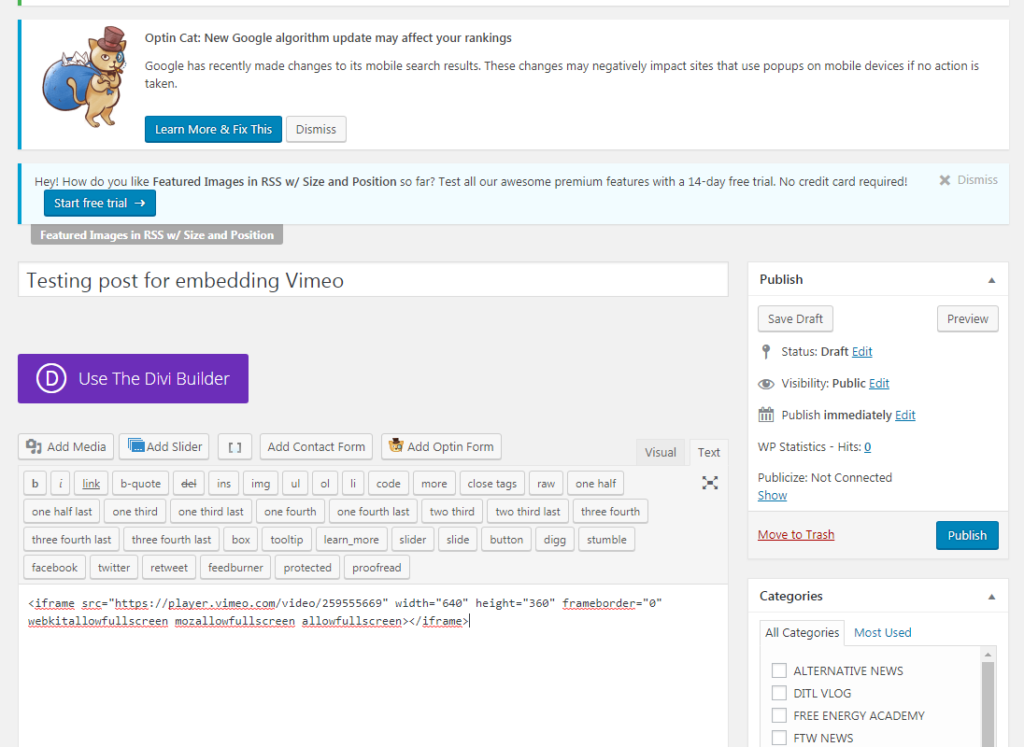
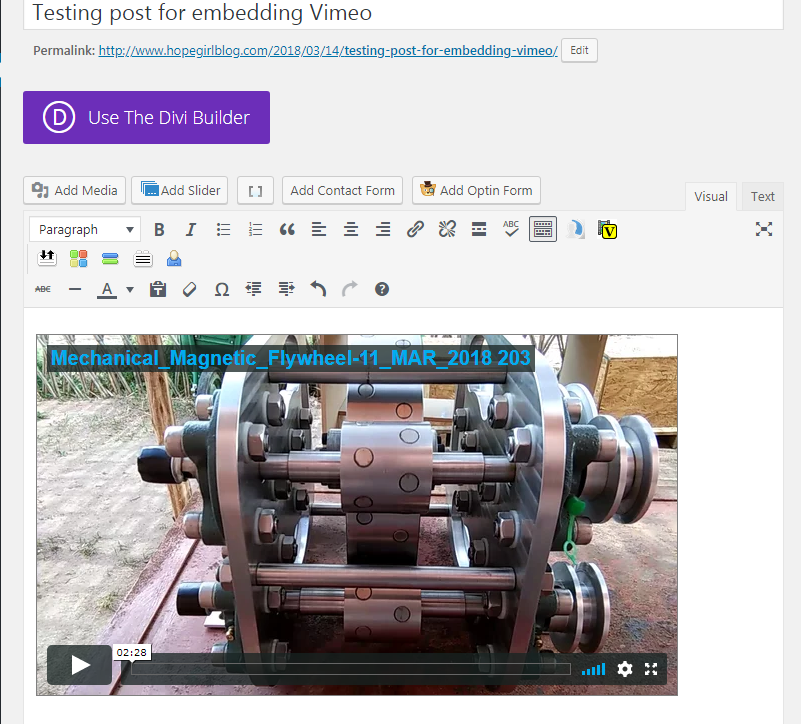
Notice that the video is displaying, you can click play, you can adjust the volume, and you can read the title of the video. However, you cannot click anything on this video that will bring the user back to the Vimeo page for the video.
This means that your video cannot be “reported” to Vimeo and will not be removed or blocked.
This same feature can be used for membership areas on your websites, etc. It’s a great way to have a private gallery on your website that your readers can watch and that is not listed on Vimeo.
Then, the next thing you’ll need to do is make sure you send your published blog post link to people on your mailing list.
Stay tuned as I’ve got more posts coming out soon regarding Youtube censorship. For now I hope this was helpful!
All the best,
Hope

